Racing engine
My Work
- Connection between the actions of the NPC cars and the realistic vehicle system
- Creating the behaviour for the NPC cars
- Creating a custom blender add-on for setting up the level and exporting it for our engine
- Hot reloading for editor mode in our engine
The racing engine was made using a snapshot of the bee engine, which is an educational C++ engine made and updated by the 2nd year programming teachers of Breda University of Applied Sciences. It had basic entity component system (ECS) functionality setup, among other things. I worked in a team consisting of 6 programming students total. It was our task to turn this into a racing engine with a blender-to-engine pipeline that can easily be used by artists and designers to make a racing game.
Racing Agents
We were going for realistic car physics, so our cars use a realistic simulation of a spark-ignition engine. This makes controlling the cars with AI a lot more difficult, as it adds a lot more dependent variables to controlling the cars. I made the an interface component that stores all variables used by the physics system and can thus be used to control the cars.
The racing agents can drive autonomously with the AI system I made, using it to set the variables of the component used by the physics simulation. With this component both players and the AI can:
- Increase/decrease throttle
- Brake
- Steer
- Engage the clutch
- Switch gears
- Engage the starter
Blender-To-Engine Pipeline
One of the requirements of the project was to create a blender-to-engine pipeline that the artists and designers can use to create a racing game using our engine. I contributed to this pipeline by making add-ons that can be loaded in blender and used to set variables used in the engine. When loading in a level/scene these variables are used to create entities with the corresponding components.
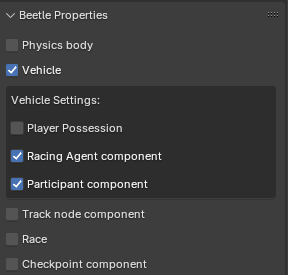
This add-on adds a custom properties window to the selected object in blenders object inspector. In this window, the user can use the checkboxes to mark an object for the desired component. Once checked it will open a drop-down window, in which you can set related variables for that component.
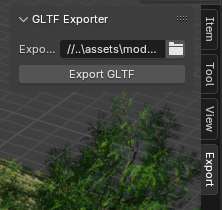
We also used the gltf file format for loading in levels and .dds for textures. When exporting a level/scene from blender we had to export it to gltf and changes the names of the textures to end in .dds from .png and .jpg. We also convert the textures to the right format using NVIDIA texture tools exporter. To simplify the steps necessary, I created an add-on that auto exports the blender level to gltf, convertes the textures and replaces the formats in the gltf to dds.